Medizintechnik DIY
Contents
- 1 Letzte Durchführung: 12 - 17 Februar 2024
- 2 Kurzbeschrieb
- 3 Location(s)
- 4 Schedule
- 5 Schlusspräsentationen / Demos Zeitplan
- 6 Skill Share Sessions
- 7 Student Teams
- 8 Zusammenfassungen
- 9 Testat
- 10 DIY-MedTech Resources
- 11 Pflichtlektüre & Videos
- 12 Weiterführende Links und Literatur
- 13 How to use this wiki

Letzte Durchführung: 12 - 17 Februar 2024
Kurzbeschrieb
Das Modul verbindet Anwendungen der Medizintechnik mit Do It Yourself (DIY) Ansätzen. Dadurch wird das tiefere Verständnis von Medizintechnischen Geräten durch einen direkten, interdisziplinären und möglichst selbstgesteuerten Zugang gefördert. Basierend auf verschiedenen elektrophysiologischen Messmodulen (EMG, EKG, EOG, EEG) entwickeln die Studierenden im Team Ideen für innovative Projekte. Erste Prototypen werden mit den Mitteln der Digitalen Fabrikation hergestellt und getestet.

Dokumentationen der früherern Durchführungen
MedTech-DIY Student projects all-stars
- Medizintechnik DIY hs23
- Medizintechnik DIY ws23
- Medizintechnik DIY hs22
- Medizintechnik DIY ws22
- Medizintechnik DIY hs21
- Medizintechnik DIY ws21
- Medizintechnik DIY 2020
- Medizintechnik DIY 2019
- Medizintechnik DIY 2018
Sämtliche Wiki-Seite früherer Durchführungen sind hier: https://www.hackteria.org/wiki/Category:MedTech-DIY
Location(s)
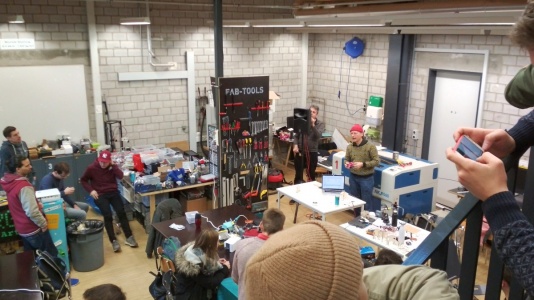
FabLab Horw (Trakt I)

Unterrichtsraum ( E202 ) (... Plätze)
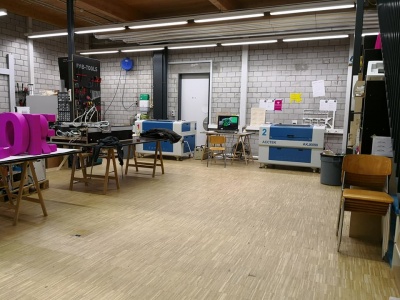
Fablab Luzern
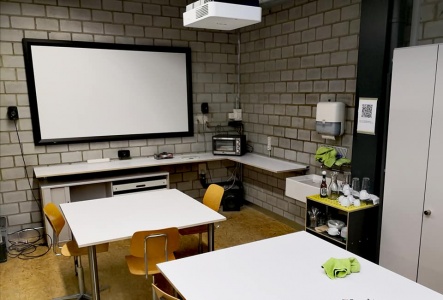
WetBioMedLab im Fablab
After the 2nd day
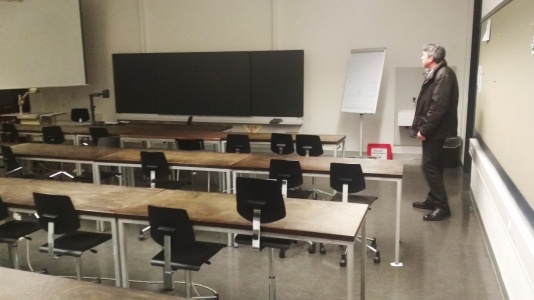
Unterrichtsraum E210


Schedule
Montag, 12. Februar - Samstag 17. Februar 2024
Täglich von 9:00 - 12.00 and 13.00 - 16:30 Uhr (Fablab offen ab 8:45)
Dienstag bis 19:00 Uhr
Samstag 10:00 - 13:00 Uhr
Wird noch updated

Content
Preparation:
- Read and Reflect
- Prepare for Team Discussion
Learn 0: Introductions
- Introduction into DIY and Fablab
- Introduction of Winterschool
- Wiki-Intro
- FabTools Introductions
- Input Lecture on MedTech and DIY Hacking Cultures
- Input Lecture Art & Science - Sense of Self
- Input Lecture Internet of Things
Hack 0: Body-Signals
- Lötle
- Experimentiere
Learn 1: Un-conferencing
- Learn from and with each other
Hack 1:
- Prototyping
- Experimenting
Hack 2:
- Refraining
- Experimenting
- more Prototyping
Share:
- Documentation
- Presentation
Post Production:
- Final Documentation
Impuls Referate MedTechDIY 2024
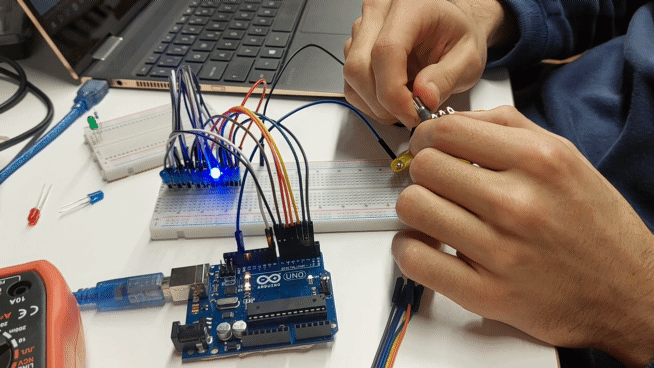
Noah Gautschi - Einstieg in die programmierbare Welt mit ARDUINO
Download Leitfaden: File:Leitfaden-für-das-Arbeiten-mit-dem-Arduino.pdf
Download Lösungsvorschläge: File:Lösungsvorschläge_Leitfaden-für-das-Arbeiten-mit-dem-Arduino.pdf
Servando Barreiro - On Open Source Music Computers and the biggest Synthesizer in the World
New Hardware Explorations and Internet of Things Possibilities
BioAmp EXG Pill by Upside Down Labs
Professional-grade analog front-end amplification for ECG, EMG, EOG, and EEG biosensing on one tiny board

from: https://store.upsidedownlabs.tech/product/bioamp-exg-pill/
BioAmp EXG Pill is a small, powerful analog-front-end (AFE) biopotential signal-acquisition board that can be paired with any microcontroller unit (MCU) or single-board computer (SBC) with an analog-to-digital converter (ADC) such as Arduino UNO & Nano, Espressif ESP32, Adafruit QtPy, STM32 Blue Pill, BeagleBone Black, and Raspberry Pi Pico, to name just a few. It also works with any dedicated ADC, like the Texas Instruments ADS1115 and ADS131M0x, among others.
https://www.crowdsupply.com/upside-down-labs/bioamp-exg-pill/updates
Die neue Hardware basiert auf dem Open Source Produkt BioAmp EXG Pill, und wurde leicht angepasst und verändert, Platine hergestellt in China, SMT bestückt, "assembled & reflow soldered", gefertigt im GaudiLabs, Luzern.
Hier findet ihr alle Beispiele von upside down labs um auf den Mikrokontroller draufzuladen: https://drive.google.com/drive/folders/1HYbmmDeCisqwocmaSp5lKK1H394y4NR7?usp=share_link
Better Serial Monitor
The serial Monitor from the Arduino IDE is not very useful for our experiments. Let's try this "better" serial monitor: https://hackaday.io/project/181686-better-serial-plotter

BYB Spike Recorder

The "original" Spike recorded by BackYard Brains is also very useful: https://backyardbrains.com/products/spikerecorder
For our EXG Pill the following code is needed: ...
Schlusspräsentationen / Demos Zeitplan
Mit den Gruppenpräsentationen wollen wir uns nochmals gemeinsam anschauen was ihr in dieser Woche gearbeitet, gelernt und erlebt habt. Zeigt was ihr geforscht und gebaut habt. Wo ihr vielleicht auch auf Probleme gestossen seit oder etwas nicht wir geplant funktioniert hat. Wie habt ihr in der Gruppe gearbeitet und was konntet ihr auch voneinander lernen. Versucht die Präsentation / Demo lebendig zu gestalten und mit verschiedenen Medien zu arbeiten.
Samstag 17. September ab 10:00
- Fablab ist ab 9:30 offen falls ihr noch letzte Vorbereitungen machen wollt.
Die Präsentationen finden UNTEN statt. Wir werden eine kleine Demobühne mit Tisch bereitstellen, den ihr brauchen könnt.
Es hat Lautsprecher, Beamer, Strom. Schaut ob ihr für eure Demo etwas umstellen müsst oder zusätzliche Technik benötigt.
Am besten bereitet ihr eure Demos/Protoypen gut vor und haltet sie bereit zum aufstellen. Die ersten 2 Teams sollten alles schon bereit haben. Während der Pause können die anderen 2 Teams ihre eigenen Prototypen noch bereitstellen. Es sollte kein grosses Geläufe mehr geben zwischen den einzelnen Präsentationen. Dazu ist die Pause da.
Infos zu dem Format der Präsentationen
Dauer pro Team: 20 Minuten, inkl 3-5 Minuten Fragen und Feedback der Studierenden.
Gestaltet den Tag unterhaltsam und authentisch, dH euer "Publikum" sind die anderen Studierenden. Gerne wollen sie erfahren was ihr gemacht habt, was euch inspiriert und auf die Ideen für eure Prototypen gebracht hat. Stellt euch und euer Team vor. Reflektiert über den Prozess wie ihr gemeinsam gearbeitet habt. Sprecht über offene Fragen / Probleme und wie ihr weitermachen würdet.
Schaut dass ihr die knappen 20 Minuten mit Filmen, guten Photos und Demos vielfältig gestaltet. Generell ist es unterhaltsamer, wenn verschiedene Leute aus dem Team unterschiedliche Phasen der Präsentation übernehmen, aber die Aufteilung müsst ihr selbst im Team abmachen. Sprecht euch gut ab, damit der Fluss / rote Faden übereinstimmt.
Zeitablauf
- Es hat Gipfeli und Snacks für alle!!
Opening
- 10.00 Willkommen und Besprechung Ablauf
Präsentationen / Demos
- 10:10 Team D: Team Dreamers
- 10:30 Team A: Team Ananas Freunde
10 min Pause
- 11:00 Team B: Team Bastler
- 11:20 Team C: Team Coconut Cowboys
5 min Pause
- 11:45 Reflektion / Feeback Runde
- 12:00 Abschluss
- 12:10 Aufräumen
- 12:30 Good-bye

Was ist eine Skill Share Session?
Wird im Rahmen der Einleitung im Detail erklärt. Hier ein paar Beispiele der verschiedenen Methoden für die Durchführung.
http://www.hackteria.org/wiki/BreakOut_Methoden
Student Teams
4 Teams à 3-4 Studierende
Aufgabe an alle Teams am ersten Tag der Blockwoche.
- Gebt euch einen eigenen originelle Teamnamen, der mit dem Anfangsbuchstaben A B C D beginnt
- Erstellt eine Wiki-Seite für euer Team.
- Lädt ein Bild auf eure Seite
- Kurzer Beschreib der Teammitglieder
Team Mentorzz 2024
- dusjagr aka Marc Dusseiller
- le pije
- Servando Barreiro
- Noah Gautschi
- Fab Managers: Chris & Michi
pd BioAmp Eurorack version


More docu on pd BioAmp
Team Ananas Freunde
Das Team Ananas Freunde nahm im Februar 2024 an der Blockwoche Medizintechnik DIY teil. Bestehend aus Oliver Krähenmann, Louis Fux, Nicolas Studer und Raffael Truttmann hat das Team Ananas Freunde während dieser Woche viel über Löten, das Arbeiten mit dem Arduino Mikrocontroller und über elektrophysiologische Messungen gelernt. In verschiedenen Projekten wurden diese gelernten Fähigkeiten gebraucht, um beispielsweise ein Mini-EKG oder einen über Nervenimpulse gesteuerten Flipperkasten zu bauen.


Team Bastler
An der Blockwoche DIY - Medizintechnik an der Hochschule Luzern Technik & Architektur nahm das Bastler-Team bestehend aus Andreas Furger, Cyrill Furrer, Nando Epp und Tim Marguth teil. Ziel dieser Intensivwoche war es, den Studierenden die Schnittstelle zwischen Technik und Medizin durch das eigenständige Entwickeln und Testen von Prototypen medizinischer Geräte näher zu bringen. Durch informative Inputs zu Themen wie Arduino-Anwendungen, Löten, Laserschneiden und 3D-Drucken wurde das Wissen der Teilnehmenden erweitert. Das Team Bastler präsentierte stolz seine selbst entwickelten Prototypen am Ende der Woche.
Im Rahmen von Hack 1 wurde ein Labyrinthpuzzle mithilfe von Servomotoren und einem Arduino realisiert. Die Herausforderung besteht darin, die Kugel durch das Labyrinth zu bewegen. Dies erfolgt durch einen am Arduino angeschlossenen Joystick. Hack 2 basiert auf dem Spiel Flappy Bird. Hierbei wird ein Schrittmotor mit einer Spindel zur Höheneinstellung des Spielcharakters verwendet. Das Spielfeld dreht sich um die Rakete und der Spieler navigiert diese durch Hindernisse, indem er einen Push-Button drückt. Das Ziel besteht darin, die Rakete möglichst lange durch die Hindernisse zu steuern.


Team Coconut Cowboys
Das Team „Coconut Cowboys“ besuchte im Februar 2024 die MedTech DIY Blockwoche. Das Team bestand aus Maxim Häussler, Marcel Bossard und Alexander Hein. Während dieser Woche haben die Teilnehmer viel über Löten, das Arbeiten mit dem Arduino Mikrocontroller und über elektrophysiologische Messungen gelernt. In verschiedenen Projektaufgaben wurden diese gelernten Fähigkeiten gebraucht, um beispielsweise ein Servo- und Schrittmotor anzusteuern, ein Mini-EKG oder einen über Nervenimpulse und Controller gesteuertes Faustschlagspiel zu bauen.


Team Dreamers
Acht LEDs in Reihe

Anzeige Muskelkraft
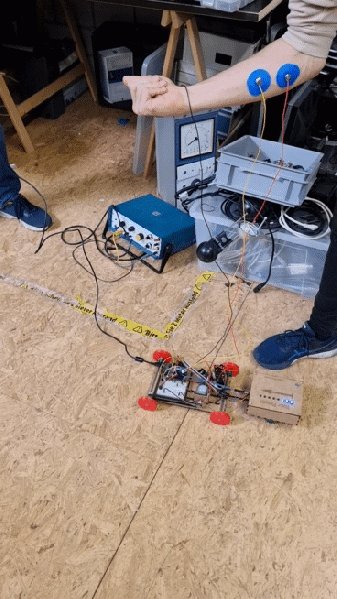
Fahrendes Auto mittels Armmuskeln


Das Team Dreamers, bestehend aus Eric Balmer, Patrick Bütler und Philipp Wyrsch, nahm an der Blockwoche DIY - Medizintechnik an der Hochschule Luzern Technik & Architektur teil. Ziel dieser Woche war es, den Studierenden die Schnittstelle zwischen Technik und Medizin näher zu bringen, indem sie Prototypen für medizinische Geräte selbst entwarfen und testeten. Die Gruppe profitierte von einem Mix aus gemeinsamen Interessen und unterschiedlichen Erfahrungen, was ein optimales Lernklima schuf. Durch Inputs zu Themen wie Löten, Arduino-Anwendung, 3D-Drucken und Laserschneiden konnten die Teilnehmer ihre Kenntnisse erweitern und am Ende der Woche ihre Prototypen vorstellen.
In mehreren Projekten experimentierte das Team mit verschiedenen Technologien: Sie führten Arduino-Hacks durch, arbeiteten mit Ultraschallsensoren, 3D-Druckern und einem Laser-Cutter, und visualisierten Muskelsignale (EMG) mit dem BioAmp EXG Pill. Die Projekte umfassten unter anderem das Blinken von LEDs, die Ansteuerung eines Servomotors und die Messung sowie Visualisierung von Muskelsignalen mit LEDs und einem Auto, das durch Armbewegungen gesteuert wird. Diese praktischen Anwendungen ermöglichten es dem Team, theoretisches Wissen in realen Projekten anzuwenden und dabei Herausforderungen wie die Kalibrierung von Schwellenwerten und die Anpassung an unterschiedliche Stromversorgungen zu meistern.
Zusammenfassungen
Beispiele aus alten Jahrgängen:
MedTech-DIY Student projects all-stars
Am Abschluss der Blockwoche, soll für jedes Team auf dieser Frontseite eine kurze Zusammenfassung gemacht werden.
Beispiel für Zusammenfassung auf Frontseite
- In einem ersten Abschnitt soll jedes Team in eingen wenigen Sätzen ihre Zusammenfassung und Reflektion beschreiben.
- Im zweiten Abschnitt ein Überblick über die Prototypen der verschiedenen Projekten als Fotogallerie und 1-2 Sätze dazu.

Testat
Teilnahme
- Pflichtlektüren gelesen
- Aktive Teilnahme an allen Tagen der Blockwoche
Leistungsnachweis
Wiki-Seite pro Gruppe (70%) mit:
- Reflektion zu Readings / Input Vorlesungen
- Dokumentation der Experimente während der Woche
(Experimente, Resultate, Erkenntnisse, Links/Resourcen, Bilder)
- Beschreibung und Reflektion der Skill Share Sessions (Eigene und Teilnahme)
- Zusammenfassung auf wiki Frontseite
Schlusspräsentation in der Gruppe am Samstag (30%)
- Raufladen der Schlusspräsentationen. Als .pdf oder slideshare.
Abgabetermin Wiki-Seiten: Sonntag 24. September 23.59
Abgabe der "Noten" bis Donnerstag, 28. September um 16 Uhr.
DIY-MedTech Resources
Quick Links
Backyard Brains DIY Muscle Shield
https://backyardbrains.com/products/diymusclespikershield
Interessante EKG Einführung
https://biosignals.berndporr.me.uk/
http://www.hackteria.org/wiki/BreakOut_Methoden
http://finding-marbles.com/retr-o-mat/was-ist-eine-agile-retrospektive/
IoT Engineering
https://github.com/tamberg/fhnw-iot/
Pflichtlektüre & Videos
Open Culture did not start with the invention of the computer
Open Culture is a concept according to which knowledge should be spread freely and its growth should come from developing, altering or enriching already existing works on the basis of sharing and collaboration, without being restricted by rules linked to the legal protection of intellectual property. In a context of globalization, the consequence is that all citizens should have equal access to information.
FabLab
Fab Charta
http://fablab-luzern.ch/info/fab-charta-2/#FabCharter
Articles
Biotechnology for All / DIY in bioanalytics: doing and grasping it yourself. SATW publication 2015

Warum Do-It-Your-Self in der Lehre? Ein Artikel der über unsere Arbeit geschrieben wurde:
SATW Info 2/15 – Biotechnology for all / DIY in bioanalytics: doing and grasping it yourself.
«Do it yourself» in der Bioanalytik – zum Download auf Deutsch
"Biotechnologische Forschung findet heute nicht mehr nur in spezialisierten Labors statt. Eine wachsende Gemeinschaft von Biologen, Bastlern und Technikbegeisterten experimentiert in Küchen, Werkstätten und Eigenbau-Labors. Einige sehen in der Demokratisierung der Biotechnologie eine Gefahr; andere die Chance für ein besseres Verständnis von komplexen wissenschaftlichen Zusammenhängen in der Gesellschaft."
The article from SATW Info 2/15 – Biotechnology for all / DIY in bioanalytics: doing and grasping it yourself is available for download in German, English and French. The pedagogic conecpt and educational kits were developed during a project funded by the Swiss Academy for Engineering Sciences (SATW), together with hackteria, M. Dusseiller and U. Gaudenz, and FHNW School for Lifesciences, Dr. D. Gygax, during a workshop with an interdisciplinary group of participants. More info here.
"A Definition of DIY: Do + It + Yourself", Garnet Hertz, Art + DIY Electronics

Read the Chapter on the Definition of DIY: File:Definition-of-DIY_GarnetHertz.pdf
A systematic theory of DIY electronic culture, drawn from a century of artists who have independently built creative technologies.
Since the rise of Arduino and 3D printing in the mid-2000s, do-it-yourself approaches to the creative exploration of technology have surged in popularity. But the maker movement is not new: it is a historically significant practice in contemporary art and design. This book documents, tracks, and identifies a hundred years of innovative DIY technology practices, illustrating how the maker movement is a continuation of a long-standing creative electronic subculture. Through this comprehensive exploration, Garnet Hertz develops a theory and language of creative DIY electronics, drawing from diverse examples of contemporary art, including work from renowned electronic artists such as Nam June Paik and such art collectives as Survival Research Laboratories and the Barbie Liberation Organization.
Hertz uncovers the defining elements of electronic DIY culture, which often works with limited resources to bring new life to obsolete objects while engaging in a critical dialogue with consumer capitalism. Whether hacking blackboxed technologies or deploying culture jamming techniques to critique commercial labor practices or gender norms, the artists have found creative ways to make personal and political statements through creative technologies. The wide range of innovative works and practices profiled in Art + DIY Electronics form a general framework for DIY culture and help inspire readers to get creative with their own adaptations, fabrications, and reimaginations of everyday technologies.
“DIY” is ambiguously undefined as a category despite being a widespread, ordinary, everyday occurrence. According to the New Oxford American Dictionary, DIY, or D.I.Y., is simply an abbreviation for “do-it-yourself.” On its own, this definition provides little clarity. Some theorists like Florian Cramer have asked whether the term DIY actually means anything at all, and they suggest that it is “best understood from within, since it includes personal involvement and entanglement.” 1 Other theorists, like Julia Lupton, talk about DIY graphic design as being able to be effective “not only to be part of a public, but also to have a public, to address an audience through acts of deliberate, designed, expression.”
Section 0.2 from the book "A Definition of DIY: Do + It + Yourself"
Interview in "The Art of Free and Open Science", MCD#68

Was ist Hackteria?
Mehr zum Artikel und Interview in MCD#68
Interview zum Download in Englisch File:MCD68-OpenScience.pdf
Hackteria is a network of people practicing DIY (do-it-yourself) biology with an interest in art, design and interdisciplinary cooperation. The network was founded in 2009 by Yashas Shetty, Andy Gracie and Marc Dusseiller and now includes not only scientists, engineers and artists, as you would expect, but also philosophers, entrepreneurs, and even foodies and chefs. Hackteria operates on a global scale, and is based on a web platform and a wiki for sharing knowledge, which enable anyone to learn but also test different ways of hacking living systems. Hackteria is not based in a physical space, and its goal is to allow artists, scientists and hackers to collaborate and test various biohacking and bioart techniques outside the official laboratories and art institutions, basically anywhere in the world.
Videos
DIY Neuroscience | BioAmp EXG Pill | Crowd Supply | EMG, ECG, EOG, EEG (Demo & Project Ideas)
How to control someone else's arm with your brain | Greg Gage
Die elektrophysiologischen Messmodulen wurden von unserem Freund Greg Gage entwickelt. Hier ein TED Video dazu:
As grad students at the University of Michigan, co-founders Tim and Greg often interacted with schoolchildren during neuroscience outreach events. We often wanted to show real "spiking" activity to students, but this was impossible due to the high cost of equipment. By using off-the-shelf electronics, we designed kits that could provide insight into the inner workings of the nervous system.
Go and look at their website! Backyard Brains - Neuroscience For Everyone!
What is Open Source explained in LEGO
Und was ist eigentlich OpenSource?
You can learn Arduino in 15 minutes
Dann brauchen wir für unsere Experimente ein Arduino. Wenn ihr das nicht schon kennt, schaut euch das mal an:
The ultimate Arduino tutorial for beginners. Learn how to choose an Arduino, dim LEDs, build a motor speed controller and more.
Weiterführende Links und Literatur
Database of 3d files
Ähnliche Kurse
Open Hardware Makers Curriculum - Bring your hardware project to the next level!
https://curriculum.openhardware.space/
Maker-Response to COVID-19 Pandemic

Stitching Together a Solution: Lessons from the Open Source Hardware Response to COVID-19
https://www.law.nyu.edu/sites/default/files/stitching-together-a-solution-202102.pdf
Brain Interfaces
Human Mind Control of Rat Cyborg’s Continuous Locomotion with Wireless Brain-to-Brain Interface
https://www.nature.com/articles/s41598-018-36885-0
Weitere Videos
Und wer noch mehr TED schauen möchte, den finden wir auch gut:
"Simplicity: We know it when we see it" | George Whitesides
Simplicity: We know it when we see it -- but what is it, exactly? In this funny, philosophical talk, George Whitesides chisels out an answer.
More about Simplicity, in the specific case of "A lab the size of a postage stamp"
"Why toys make good medical devices | Jose Gomez-Marquez
We develop empowerment technologies for health. We believe that innovation and design happens at the frontline of healthcare where providers and patients can invent everyday technologies to improve outcomes. By radically democratizing the tools of medical creation, we seek to enable front line patients and providers to invent answers to disease burdens.
https://jfgm.scripts.mit.edu/littledeviceslab/
GOSH - Gathering for Open Science Hardware
From microscopes to microfluidics and water quality test equipment, hardware is a vital part of science. Advances in instrumentation have been central to scientific revolutions and access to hardware shapes the work of communities conducting research globally on a daily basis. However, the current supply chain for science hardware limits access for many groups of people and impedes creativity and customisation. Open Science Hardware (OScH) means sharing designs for scientific hardware openly online that anyone is freely able to use, modify and even commercialize. This approach could drastically reduce the costs of research while enabling people to collaborate and learn in new ways.
The Global Open Science Hardware community supports OScH by convening meetings such as the Gathering for Open Science Hardware (GOSH), publications, activities and providing a forum for the community.
See more on GOSH website and join the forum to discuss!
Together we will make Open Science Hardware ubiquitous by 2025 and build new futures for science.
Low-Cost and Open Source Tools
uber tutlke
How to use this wiki
einen Titel
uber tutlke
under under titel
Dear participants, please make sure you prepare your account and get some first experience in using a wiki, in this case it's MediaWiki the same software on which the famous wikipedia has been created. The previous link directs you to many instructions on how to use a wiki. look at it.
Try it out and create a new page for your team's project notes and documentation, give it a reasonable name.
CATCHA
To prevent spam, we have a catcha in place. At the bottom of the page, when you edit something, you need to reply to a simple question. So we make sure you are not a robot :-)
Change your password
You should have received a login by now. In the right upper corner you should see a link to your user preferences. Please change your password!
Use Category
Make sure you add the following line at the end of all the pages you create, so it will be sorted all in the same category. Future students will be happy!
[[ Category:MedTech-DIY ]]