Difference between revisions of "Team Amigo"
(→Codes) |
(→Codes) |
||
| Line 138: | Line 138: | ||
Trotzdem wurde der Prototyp zusammengebaut und konnte zum Fahren gebracht werden. | Trotzdem wurde der Prototyp zusammengebaut und konnte zum Fahren gebracht werden. | ||
===== Codes ===== | ===== Codes ===== | ||
| − | Servomotor | + | Servomotor: |
| + | //Written By Nikodem Bartnik - nikodembartnik.pl | ||
| + | #define STEPPER_PIN_1 9 | ||
| + | #define STEPPER_PIN_2 10 | ||
| + | #define STEPPER_PIN_3 11 | ||
| + | #define STEPPER_PIN_4 12 | ||
| + | int step_number = 3; | ||
| + | void setup() { | ||
| + | pinMode(STEPPER_PIN_1, OUTPUT); | ||
| + | pinMode(STEPPER_PIN_2, OUTPUT); | ||
| + | pinMode(STEPPER_PIN_3, OUTPUT); | ||
| + | pinMode(STEPPER_PIN_4, OUTPUT); | ||
| + | |||
| + | } | ||
| + | |||
| + | void loop() { | ||
| + | |||
| + | OneStep(true); | ||
| + | delay(2); | ||
| + | |||
| + | |||
| + | } | ||
| + | |||
| + | |||
| + | void OneStep(bool dir){ | ||
| + | if(dir){ | ||
| + | switch(step_number){ | ||
| + | case 0: | ||
| + | digitalWrite(STEPPER_PIN_1, HIGH); | ||
| + | digitalWrite(STEPPER_PIN_2, LOW); | ||
| + | digitalWrite(STEPPER_PIN_3, LOW); | ||
| + | digitalWrite(STEPPER_PIN_4, LOW); | ||
| + | break; | ||
| + | case 1: | ||
| + | digitalWrite(STEPPER_PIN_1, LOW); | ||
| + | digitalWrite(STEPPER_PIN_2, HIGH); | ||
| + | digitalWrite(STEPPER_PIN_3, LOW); | ||
| + | digitalWrite(STEPPER_PIN_4, LOW); | ||
| + | break; | ||
| + | case 2: | ||
| + | digitalWrite(STEPPER_PIN_1, LOW); | ||
| + | digitalWrite(STEPPER_PIN_2, LOW); | ||
| + | digitalWrite(STEPPER_PIN_3, HIGH); | ||
| + | digitalWrite(STEPPER_PIN_4, LOW); | ||
| + | break; | ||
| + | case 3: | ||
| + | digitalWrite(STEPPER_PIN_1, LOW); | ||
| + | digitalWrite(STEPPER_PIN_2, LOW); | ||
| + | digitalWrite(STEPPER_PIN_3, LOW); | ||
| + | digitalWrite(STEPPER_PIN_4, HIGH); | ||
| + | break; | ||
| + | } | ||
| + | }else{ | ||
| + | switch(step_number){ | ||
| + | case 0: | ||
| + | digitalWrite(STEPPER_PIN_1, LOW); | ||
| + | digitalWrite(STEPPER_PIN_2, LOW); | ||
| + | digitalWrite(STEPPER_PIN_3, LOW); | ||
| + | digitalWrite(STEPPER_PIN_4, HIGH); | ||
| + | break; | ||
| + | case 1: | ||
| + | digitalWrite(STEPPER_PIN_1, LOW); | ||
| + | digitalWrite(STEPPER_PIN_2, LOW); | ||
| + | digitalWrite(STEPPER_PIN_3, HIGH); | ||
| + | digitalWrite(STEPPER_PIN_4, LOW); | ||
| + | break; | ||
| + | case 2: | ||
| + | digitalWrite(STEPPER_PIN_1, LOW); | ||
| + | digitalWrite(STEPPER_PIN_2, HIGH); | ||
| + | digitalWrite(STEPPER_PIN_3, LOW); | ||
| + | digitalWrite(STEPPER_PIN_4, LOW); | ||
| + | break; | ||
| + | case 3: | ||
| + | digitalWrite(STEPPER_PIN_1, HIGH); | ||
| + | digitalWrite(STEPPER_PIN_2, LOW); | ||
| + | digitalWrite(STEPPER_PIN_3, LOW); | ||
| + | digitalWrite(STEPPER_PIN_4, LOW); | ||
| + | |||
| + | |||
| + | } | ||
| + | } | ||
| + | step_number++; | ||
| + | if(step_number > 3){ | ||
| + | step_number = 0; | ||
| + | } | ||
| + | } | ||
| + | Gesichts Sensorik: | ||
| + | // Eye Blink Detection (Experimental!) - BioAmp EXG Pill | ||
| + | // https://github.com/upsidedownlabs/BioAmp-EXG-Pill | ||
| + | |||
| + | // Upside Down Labs invests time and resources providing this open source code, | ||
| + | // please support Upside Down Labs and open-source hardware by purchasing | ||
| + | // products from Upside Down Labs! | ||
| + | |||
| + | // Copyright (c) 2021 Upside Down Labs - contact@upsidedownlabs.tech | ||
| + | |||
| + | // Permission is hereby granted, free of charge, to any person obtaining a copy | ||
| + | // of this software and associated documentation files (the "Software"), to deal | ||
| + | // in the Software without restriction, including without limitation the rights | ||
| + | // to use, copy, modify, merge, publish, distribute, sublicense, and/or sell | ||
| + | // copies of the Software, and to permit persons to whom the Software is | ||
| + | // furnished to do so, subject to the following conditions: | ||
| + | |||
| + | // The above copyright notice and this permission notice shall be included in all | ||
| + | // copies or substantial portions of the Software. | ||
| + | |||
| + | // THE SOFTWARE IS PROVIDED "AS IS", WITHOUT WARRANTY OF ANY KIND, EXPRESS OR | ||
| + | // IMPLIED, INCLUDING BUT NOT LIMITED TO THE WARRANTIES OF MERCHANTABILITY, | ||
| + | // FITNESS FOR A PARTICULAR PURPOSE AND NONINFRINGEMENT. IN NO EVENT SHALL THE | ||
| + | // AUTHORS OR COPYRIGHT HOLDERS BE LIABLE FOR ANY CLAIM, DAMAGES OR OTHER | ||
| + | // LIABILITY, WHETHER IN AN ACTION OF CONTRACT, TORT OR OTHERWISE, ARISING FROM, | ||
| + | // OUT OF OR IN CONNECTION WITH THE SOFTWARE OR THE USE OR OTHER DEALINGS IN THE | ||
| + | // SOFTWARE. | ||
| + | |||
| + | #include <math.h> | ||
| + | |||
| + | #define SAMPLE_RATE 75 | ||
| + | #define BAUD_RATE 115200 | ||
| + | #define INPUT_PIN A0 | ||
| + | #define OUTPUT_PIN 13 | ||
| + | #define DATA_LENGTH 10 | ||
| + | |||
| + | int data_index = 0; | ||
| + | bool peak = false; | ||
| + | |||
| + | |||
| + | void setup() { | ||
| + | // Serial connection begin | ||
| + | Serial.begin(BAUD_RATE); | ||
| + | // Setup Input & Output pin | ||
| + | pinMode(INPUT_PIN, INPUT); | ||
| + | pinMode(OUTPUT_PIN, OUTPUT); | ||
| + | } | ||
| + | |||
| + | void loop() { | ||
| + | // Calculate elapsed time | ||
| + | static unsigned long past = 0; | ||
| + | unsigned long present = micros(); | ||
| + | unsigned long interval = present - past; | ||
| + | past = present; | ||
| + | |||
| + | // Run timer | ||
| + | static long timer = 0; | ||
| + | timer -= interval; | ||
| + | |||
| + | // Sample | ||
| + | if(timer < 0){ | ||
| + | timer += 1000000 / SAMPLE_RATE; | ||
| + | // Sample and Nomalize input data (-1 to 1) | ||
| + | float sensor_value = analogRead(INPUT_PIN); | ||
| + | float signal = EOGFilter(sensor_value)/512; | ||
| + | // Get peak | ||
| + | peak = Getpeak(signal); | ||
| + | // Print sensor_value and peak | ||
| + | Serial.print(signal); | ||
| + | Serial.print(","); | ||
| + | Serial.println(peak); | ||
| + | // Blink LED on peak | ||
| + | digitalWrite(OUTPUT_PIN, peak); | ||
| + | } | ||
| + | } | ||
| + | |||
| + | bool Getpeak(float new_sample) { | ||
| + | // Buffers for data, mean, and standard deviation | ||
| + | static float data_buffer[DATA_LENGTH]; | ||
| + | static float mean_buffer[DATA_LENGTH]; | ||
| + | static float standard_deviation_buffer[DATA_LENGTH]; | ||
| + | |||
| + | // Check for peak | ||
| + | if (new_sample - mean_buffer[data_index] > (DATA_LENGTH*1.2) * standard_deviation_buffer[data_index]) { | ||
| + | data_buffer[data_index] = new_sample + data_buffer[data_index]; | ||
| + | peak = true; | ||
| + | } else { | ||
| + | data_buffer[data_index] = new_sample; | ||
| + | peak = false; | ||
| + | } | ||
| + | |||
| + | // Calculate mean | ||
| + | float sum = 0.0, mean, standard_deviation = 0.0; | ||
| + | for (int i = 0; i < DATA_LENGTH; ++i){ | ||
| + | sum += data_buffer[(data_index + i) % DATA_LENGTH]; | ||
| + | } | ||
| + | mean = sum/DATA_LENGTH; | ||
| + | |||
| + | // Calculate standard deviation | ||
| + | for (int i = 0; i < DATA_LENGTH; ++i){ | ||
| + | standard_deviation += pow(data_buffer[(i) % DATA_LENGTH] - mean, 2); | ||
| + | } | ||
| + | |||
| + | // Update mean buffer | ||
| + | mean_buffer[data_index] = mean; | ||
| + | |||
| + | // Update standard deviation buffer | ||
| + | standard_deviation_buffer[data_index] = sqrt(standard_deviation/DATA_LENGTH); | ||
| + | |||
| + | // Update data_index | ||
| + | data_index = (data_index+1)%DATA_LENGTH; | ||
| + | |||
| + | // Return peak | ||
| + | return peak; | ||
| + | } | ||
| + | |||
| + | // Band-Pass Butterworth IIR digital filter, generated using filter_gen.py. | ||
| + | // Sampling rate: 75.0 Hz, frequency: [0.5, 19.5] Hz. | ||
| + | // Filter is order 4, implemented as second-order sections (biquads). | ||
| + | // Reference: | ||
| + | // https://docs.scipy.org/doc/scipy/reference/generated/scipy.signal.butter.html | ||
| + | // https://courses.ideate.cmu.edu/16-223/f2020/Arduino/FilterDemos/filter_gen.py | ||
| + | float EOGFilter(float input) | ||
| + | { | ||
| + | float output = input; | ||
| + | { | ||
| + | static float z1, z2; // filter section state | ||
| + | float x = output - 0.02977423*z1 - 0.04296318*z2; | ||
| + | output = 0.09797471*x + 0.19594942*z1 + 0.09797471*z2; | ||
| + | z2 = z1; | ||
| + | z1 = x; | ||
| + | } | ||
| + | { | ||
| + | static float z1, z2; // filter section state | ||
| + | float x = output - 0.08383952*z1 - 0.46067709*z2; | ||
| + | output = 1.00000000*x + 2.00000000*z1 + 1.00000000*z2; | ||
| + | z2 = z1; | ||
| + | z1 = x; | ||
| + | } | ||
| + | { | ||
| + | static float z1, z2; // filter section state | ||
| + | float x = output - -1.92167271*z1 - 0.92347975*z2; | ||
| + | output = 1.00000000*x + -2.00000000*z1 + 1.00000000*z2; | ||
| + | z2 = z1; | ||
| + | z1 = x; | ||
| + | } | ||
| + | { | ||
| + | static float z1, z2; // filter section state | ||
| + | float x = output - -1.96758891*z1 - 0.96933514*z2; | ||
| + | output = 1.00000000*x + -2.00000000*z1 + 1.00000000*z2; | ||
| + | z2 = z1; | ||
| + | z1 = x; | ||
| + | } | ||
| + | return output; | ||
| + | } | ||
| + | Kombination Servomotor / Gesichts Sensorik (Versuch) | ||
| + | // Include the Arduino Stepper.h library: | ||
| + | #include <Stepper.h> | ||
| + | |||
| + | // Servo Control - BioAmp EXG Pill | ||
| + | // https://github.com/upsidedownlabs/BioAmp-EXG-Pill | ||
| + | |||
| + | // Upside Down Labs invests time and resources providing this open source code, | ||
| + | // please support Upside Down Labs and open-source hardware by purchasing | ||
| + | // products from Upside Down Labs! | ||
| + | |||
| + | // Copyright (c) 2021 Upside Down Labs - contact@upsidedownlabs.tech | ||
| + | |||
| + | // Permission is hereby granted, free of charge, to any person obtaining a copy | ||
| + | // of this software and associated documentation files (the "Software"), to deal | ||
| + | // in the Software without restriction, including without limitation the rights | ||
| + | // to use, copy, modify, merge, publish, distribute, sublicense, and/or sell | ||
| + | // copies of the Software, and to permit persons to whom the Software is | ||
| + | // furnished to do so, subject to the following conditions: | ||
| + | |||
| + | // The above copyright notice and this permission notice shall be included in all | ||
| + | // copies or substantial portions of the Software. | ||
| + | |||
| + | // THE SOFTWARE IS PROVIDED "AS IS", WITHOUT WARRANTY OF ANY KIND, EXPRESS OR | ||
| + | // IMPLIED, INCLUDING BUT NOT LIMITED TO THE WARRANTIES OF MERCHANTABILITY, | ||
| + | // FITNESS FOR A PARTICULAR PURPOSE AND NONINFRINGEMENT. IN NO EVENT SHALL THE | ||
| + | // AUTHORS OR COPYRIGHT HOLDERS BE LIABLE FOR ANY CLAIM, DAMAGES OR OTHER | ||
| + | // LIABILITY, WHETHER IN AN ACTION OF CONTRACT, TORT OR OTHERWISE, ARISING FROM, | ||
| + | // OUT OF OR IN CONNECTION WITH THE SOFTWARE OR THE USE OR OTHER DEALINGS IN THE | ||
| + | // SOFTWARE. | ||
| + | |||
| + | #if defined(ESP32) | ||
| + | #include <ESP32Servo.h> | ||
| + | #else | ||
| + | #include <Servo.h> | ||
| + | #endif | ||
| + | |||
| + | // Define number of steps per rotation: | ||
| + | const int stepsPerRevolution = 1024; // 2048; | ||
| + | |||
| + | int muscle_trigger = 1; | ||
| + | |||
| + | // Wiring: | ||
| + | // Pin 8 to IN1 on the ULN2003 driver | ||
| + | // Pin 9 to IN2 on the ULN2003 driver | ||
| + | // Pin 10 to IN3 on the ULN2003 driver | ||
| + | // Pin 11 to IN4 on the ULN2003 driver | ||
| + | |||
| + | // Create stepper object called 'myStepper', note the pin order: | ||
| + | Stepper myStepper = Stepper(stepsPerRevolution, 8, 10, 9, 11); | ||
| + | |||
| + | #define SAMPLE_RATE 500 | ||
| + | #define BAUD_RATE 115200 | ||
| + | #define INPUT_PIN A0 | ||
| + | #define BUFFER_SIZE 500 | ||
| + | #define SERVO_PIN 10 | ||
| + | #define EMG_MIN 2 | ||
| + | #define EMG_MAX 10 | ||
| + | |||
| + | int circular_buffer[BUFFER_SIZE]; | ||
| + | int data_index, sum; | ||
| + | |||
| + | Servo servo; | ||
| + | |||
| + | void setup() { | ||
| + | // Set the speed to 5 rpm: | ||
| + | myStepper.setSpeed(35); | ||
| + | |||
| + | // Serial connection begin | ||
| + | Serial.begin(BAUD_RATE); | ||
| + | // Attach servo | ||
| + | servo.attach(SERVO_PIN); | ||
| + | } | ||
| + | |||
| + | //////////////////////////// | ||
| + | void move_cw(int steps){ | ||
| + | myStepper.step(steps); | ||
| + | } | ||
| + | |||
| + | //////////////////////////// | ||
| + | void move_ccw(int steps){ | ||
| + | myStepper.step(-steps); | ||
| + | } | ||
| + | |||
| + | //////////////////////////// | ||
| + | void check_muscle(){ | ||
| + | if (muscle_trigger > 0){ | ||
| + | move_ccw(10); | ||
| + | } | ||
| + | } | ||
| + | |||
| + | void loop() { | ||
| + | // Step one revolution in one direction: | ||
| + | Serial.println("clockwise"); | ||
| + | myStepper.step(stepsPerRevolution); | ||
| + | delay(500); | ||
| + | |||
| + | // Step one revolution in the other direction: | ||
| + | Serial.println("counterclockwise"); | ||
| + | myStepper.step(-stepsPerRevolution); | ||
| + | delay(500); | ||
| + | |||
| + | // Calculate elapsed time | ||
| + | static unsigned long past = 0; | ||
| + | unsigned long present = micro | ||
<br clear=all> | <br clear=all> | ||
Revision as of 14:43, 21 February 2023
Contents
Einleitung
MEDTECH DIY Blockwoche
Herzlich willkommen auf der offiziellen Seite von Team Amigo. Im Rahmen der Blockwoche Medizintechnik DIY wurde das Projektteam Amigo gegründet. Die Blockwoche wurde vom 13. bis 18. Februar 2023 an der Hochschule Luzern Technik & Architektur im FabLab durchgeführt. Ziel dieser Blockwoche ist es, den Studierenden die Schnittstelle zwischen Technik und Medizin näher zu bringen, indem sie selber Prototyps für medizinische Geräte entwickeln und testen. Dazu wurden von den Blockwochenleiter vorläufig immer ein Input gehalten, wie sich die Teams ihren Zielen annähern können. In diesen Inputs wurde unteranderem das Löten, wie Andurino angewendet wird und die 3D Drucker funktionieren, aufgezeigt. Ende Woche wurden dann die Prototypen den anderen Gruppen in einer Präsentation vorgestellt.
FabLab
Das FabLab ist an der Hochschule Technik & Architektur in Horw angesiedelt und ist für Alle zugänglich. Zu Beginn benötigt es allerdings eine Einführung durch das Fachpersonal. Das FabLab gibt es jedoch nicht nur in Luzern, sondern auf der ganzen Welt, das Ziel der FabLabs ist es Privatpersonen eine Möglichkeit zu geben wo sie an modernen Fertigungsanlagen arbeiten können. Weitere Informationen findet man unter: https://fablab-luzern.ch/
Es sind folgende Geräte vorhanden:
- Laser Cutter vom Typ AKJ-6090 von Acctek (Beschreiben)
- 3D-Drucker Ultimaker2+ (Beschreiben)
- CNC - Maschiene
- Fräsen
Das FabLab ist ebenso mit allem Werkzeug ausgestattet welches man sich vorstellen kan.
DIY
Programm
Informationen findet man unter Schedule auf: https://www.hackteria.org/wiki/Medizintechnik_DIY
Geh zurück auf Medizintechnik DIY
Team
Team Avengers besteht aus den folgenden Helden:
Saranda studiert im 6. Semester Medizintechnik. Ihre stärken sind Fachwissen in Medizintechnik und Arbeiten, wo ein hohes Mass an Fingerspitzen gefühl gefordet sind.
Stefan studiert im 6. Semester Wirtschaftsingenieur. Seine stärken liegen in programmieren und Sachen austesten.
Learn 0
Introductions
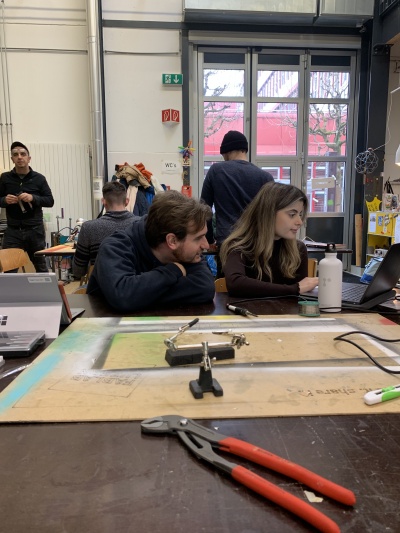
Als wir hier hergekommen sind am Montag morgen und uns alle das erste Mal sahen gab es eine Vorstellungsrunde. Gewisse von uns haben sich bereits von anderen Kursen und Vorlesungen gekannt andere haben sich noch nie gesehen, da es im Kurs auch Studenten von verschiedenen Semestern hat. Zur Vorstellung hat jeder ein Gegenstand von einem Tisch genommen und musste dann etwas zu sich sagen und wieso man diesen Gegenstand genommen hatte. Wir hatten uns dann in Gruppen aufgeteilt, das Ziel war, dass man sich nicht bereits im Vorhinein kennt und dass die Mitglieder einer Gruppe von mehreren Studiengängen sind. Anschliessend wurden wir von Marc kurz durchs FabLab geführt wo er uns die 3D Drucker und Laser zeigte und wir Material zum Arbeiten erhielten. Danach haben uns dann auf der Galerie versammelt wo er uns über die Blockwoche orientierte, dann war bereits Zeit für Lunch.
Am Nachmittag triefen wir uns direkt im Schulzimmer wo wir die Vorstellung und Einführung ins Wiki-tool erhielten. Marc und TeZ haben sich dann auch noch richtig vorgestellt und uns einen Input zum Thema medtech DIY gegeben und uns etwas zum Thema Opensource unterrichtet.
Opensource
Hack 0
Body-Signals
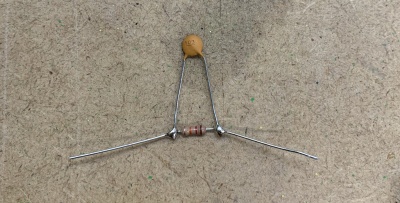
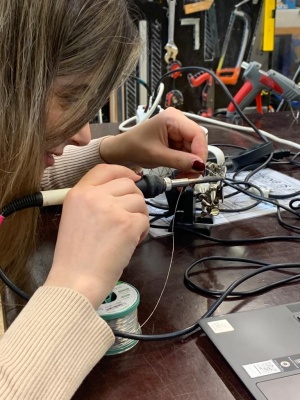
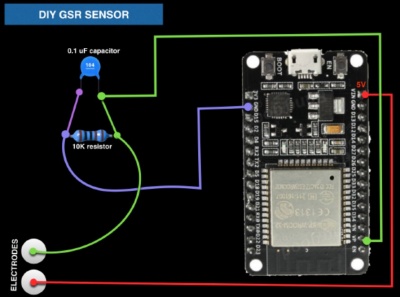
Wieder zurück im FabLab wagten wir uns an die ersten praktischen Versuche. Wir durften einen Widerstand und einen Kondensator zusammenlöten. Auf der einen Seite haben wir dann ein Kabel angelötet auf der anderen zwei Kabel. Da wo es zwei Kabel hatten löteten wir ein Kupfertape an das einte Kabel. Die Zwei Kabel die dann noch föhrig waren haben wir mit Feather S3 verbunden an welchem wir noch ein weiteres Kabel mit Kupfer Tape verbunden. Wir haben dann den Feather S3 Mit dem Computer verbunden und konnten so unsere Körperimpulse messen.
Das zweite Experiment von Hack 0 war dann nicht mehr ganz so trivial. Zu beginn mussten den Feather S3 mit dem BioAmp EXG Pill verbinden an welchem wir unsere Sensoren angehängt hatten. Danach plotteten wir das Signal unserer Muskeln am Unterarm, als das dann funktionierte druckten wir den Greifarm aus an welchem wir einen Servomotor anhängten welcher dann auf anspannen der Muskeln den Greifarm steuerte.
Als erstes haben wir den Kondensator mit dem Wiederstand zusammen gelötet. Auf der einten Seite haben wir den einten Kabel mit dem Microkontroller. Auf der anderen Seite, wurden zwei Kabel dran gelötet, der einte wurde auch mit dem Microkontrollerverbunden. Der andere Kabel wurde mit einem Elektroden verbunden (welche auf deiner Kupferfolie dran geklebt waren.
Mit diesem Versuch wurde die Leitfähigkeit der Haut getestet. Desto feuchter die Haut war desto höher waren die Signale, welche wir in Arduino Idle gesehen haben.
Hack 1
EMG (Electromyograph with EXG pill)
Als haben wir einen Code ins Arduino aufgeladen. Dann haben wir die Kabelverbindung des Microkontrollers angepasst. Somit konnten wir dann die Muskelaktivität ändern. Allerdings ergaben sich verschiedene Verbindungsprobleme zwischen dem Microkontroller und dem Computer. Dabei konnte die angepasste Software nicht mich auf dem Microkontroller drauf geladen werden. Nach dem wir einen Tag investiert haben um unser Problem zu lösen, entschieden wir uns das ältere, jedoch zuverlässigere Model Arduino, dem Feather S3 vorzuziehen. Die Hardware wurde mit einem Servo Motor erweitert. Denn neuen Code, welcher für den Servomotor ausgelegt war, haben wir in das Arduino programmiert. Zeitgleich haben wir den Greifarm mit einem 3D Drucker ausgedruckt. Danach konten wir den Greifarm verkabelt und das Programm laufen lassen. Nach einigen Tests und Parameter Anpassungen, hat es dann endlich funktioniert. Dies war dann unser erster und erfolgreicher Prototyp.
Das Video dazu findet man unter diesem Link: https://www.youtube.com/shorts/wsq52IB402E
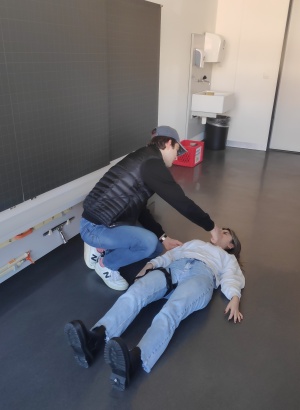
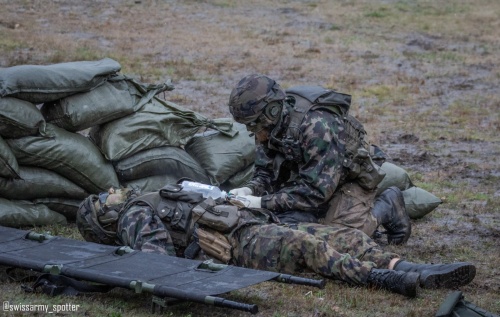
TCCC Einführung
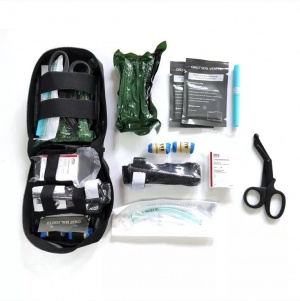
Bei unserem Skillshare haben wir den Anwesenden Studenten eine Einführung in die Taktische Medizin nach TCCC (Tacticle Combat Casualty Care) gegeben. Wir haben geschaut wie man reagiert, wenn jemand im Gefecht down geht. Fokus des Skillshares war der M.A.R.C.H. Algorythmus welcher internationaler Standart ist, das M.A.R.C.H. ist ähnlich wie das Gabi oder Abc, man möchte den Zustand der verwundeten Person herausfinden, jedoch bezieht sich das M.A.R.C.H. auf Situationen im Gefecht. Ablauf des M.A.R.C.H.
Man geht nach Bedrohlichkeit der Verletzung vor, dass heisst man behandelt zuerst was einem am schnellsten umbringt.
M: Massive bleeding Man untersucht de Körper auf massive Blutungen, diesen sollten so schnell wie möglich gestoppt werden da Volumenverlust die häufigste Todesursache im Gefecht ist.
A: Airways Man schaut ob die Person atmet und falls nicht behebt man dieses Problem.
R: Respiration Hier untersucht man ob der Patient Verletzungen am Oberkörperaufweis welche allenfalls die Lungenfunktion behindern können.
C: Circulation Der Ganze Körper des Verwundeten wird auf kleinere äussere Verletzungen untersucht.
H: Head/Hypothermia Den Kopf zu untersuchen ist sehr wichtig sowie zu schauen dass die Verwundete Person nicht unterkühlt.
Den anderen Studenten hatte der Skillshare sehr gut gefallen und es konnten viele Fragen zum Thema Gefecht und Erstversorgung beantwortet werden so dass wenn sie einmal in eine Situation mit einer verletzten Person geraten handeln können.
Hack 2
Scheibenwischerbrille
Nach einen intensiven Brainstorming, haben wir uns für das Projekt Brillenscheibenwischer entschieden. Wir hatten die Idee Visierscheibenwischer für Motoradfahrer zu entwickeln, da diese oftmals durch schlechte Schlechte Sicht während Unwetter beeinträchtigt sind. Da wir so begeistert von der Sensorik waren, haben wir diese für unser nächstes Projekt wieder angewendet. ALs erster Prototyp erstellten wir eine Brille, welche wir mit dem Lasercutter ausgeschnitten haben. Die Grösse des Brillengestell musste jedoch in mehreren Versuchen angepasst werden. An der Brille wurde anschliessend ein zweiter Servomotor angeschlossen und der Anschlagwinkel der beiden Servos korrigiert.
Als nächstes Ziel wurde die Sensorik, welche das Signal von der rechten Hand erfasst, angepasst, um zukünftig das Signal über das Bitzeln mit den Augen erfassen zu könne.
Hier wurde ebenfalls der Code leicht angepasst.
https://www.youtube.com/shorts/LwRVg9LX4s8
Hack 3
Carrera
Im dritten Hack wollte das Team Amigo vermehrt auf das Thema Medizintechnik zurückkehren. Dafür wurde eine kurze Brainstorming Session genutzt, um nochmals neue Ideen zu kreieren. Die Idee war eine Carrerabahn zu erstellen, welche mit dem Gesicht gesteuert werden kann. So können auch Tetraplegiker, welche nur noch den Kopf vollständig bewegen können, trotzdem an einem Rennen teilhaben. Es wurde beschlossen die Gesichts Sensorik weiterhin zu untersuchen und besser zu verstehen, gleichzeitig wurde nach einem geeigneten Servomotor Ausschau gehalten. Für den Servomotor wurde im Internet nach einem passenden Code gesucht und anschliessend auf das Arduino geladen, danach wurde das Arduino mit dem Motor verkabelt. Tez nahm sich Zeit, um einem Gruppenmitglied den Code und dessen Funktionen zu erklären. Dank ihm konnte der Servomotor schnell zum Laufen gebracht werden Für den ersten Prototypen wurde ein simples Chassis mit dem Lasercutter ausgedruckt. Für den Motor wurde eine Halterung im CAD gezeichnet und anschliessend mit dem 3D Drucker gedruckt. Die Schwierigkeit bestand darin, den Code der Gesichts Sensorik mit dem Code vom Servomotor zu kombinieren. Aufgrund der begrenzten Zeit und Mangel and Programmierwissen konnte der letzte Hack nicht vollständig funktionierend fertig gestellt werden. Trotzdem wurde der Prototyp zusammengebaut und konnte zum Fahren gebracht werden.
Codes
Servomotor: //Written By Nikodem Bartnik - nikodembartnik.pl
- define STEPPER_PIN_1 9
- define STEPPER_PIN_2 10
- define STEPPER_PIN_3 11
- define STEPPER_PIN_4 12
int step_number = 3; void setup() { pinMode(STEPPER_PIN_1, OUTPUT); pinMode(STEPPER_PIN_2, OUTPUT); pinMode(STEPPER_PIN_3, OUTPUT); pinMode(STEPPER_PIN_4, OUTPUT);
}
void loop() {
 OneStep(true);
 delay(2);
}
void OneStep(bool dir){
if(dir){
switch(step_number){
 case 0:
 digitalWrite(STEPPER_PIN_1, HIGH);
 digitalWrite(STEPPER_PIN_2, LOW);
 digitalWrite(STEPPER_PIN_3, LOW);
 digitalWrite(STEPPER_PIN_4, LOW);
 break;
 case 1:
 digitalWrite(STEPPER_PIN_1, LOW);
 digitalWrite(STEPPER_PIN_2, HIGH);
 digitalWrite(STEPPER_PIN_3, LOW);
 digitalWrite(STEPPER_PIN_4, LOW);
 break;
 case 2:
 digitalWrite(STEPPER_PIN_1, LOW);
 digitalWrite(STEPPER_PIN_2, LOW);
 digitalWrite(STEPPER_PIN_3, HIGH);
 digitalWrite(STEPPER_PIN_4, LOW);
 break;
 case 3:
 digitalWrite(STEPPER_PIN_1, LOW);
 digitalWrite(STEPPER_PIN_2, LOW);
 digitalWrite(STEPPER_PIN_3, LOW);
 digitalWrite(STEPPER_PIN_4, HIGH);
 break;
}
 }else{
   switch(step_number){
 case 0:
 digitalWrite(STEPPER_PIN_1, LOW);
 digitalWrite(STEPPER_PIN_2, LOW);
 digitalWrite(STEPPER_PIN_3, LOW);
 digitalWrite(STEPPER_PIN_4, HIGH);
 break;
 case 1:
 digitalWrite(STEPPER_PIN_1, LOW);
 digitalWrite(STEPPER_PIN_2, LOW);
 digitalWrite(STEPPER_PIN_3, HIGH);
 digitalWrite(STEPPER_PIN_4, LOW);
 break;
 case 2:
 digitalWrite(STEPPER_PIN_1, LOW);
 digitalWrite(STEPPER_PIN_2, HIGH);
 digitalWrite(STEPPER_PIN_3, LOW);
 digitalWrite(STEPPER_PIN_4, LOW);
 break;
 case 3:
 digitalWrite(STEPPER_PIN_1, HIGH);
 digitalWrite(STEPPER_PIN_2, LOW);
 digitalWrite(STEPPER_PIN_3, LOW);
 digitalWrite(STEPPER_PIN_4, LOW);
}
}
step_number++;
 if(step_number > 3){
   step_number = 0;
 }
} Gesichts Sensorik: // Eye Blink Detection (Experimental!) - BioAmp EXG Pill // https://github.com/upsidedownlabs/BioAmp-EXG-Pill
// Upside Down Labs invests time and resources providing this open source code, // please support Upside Down Labs and open-source hardware by purchasing // products from Upside Down Labs!
// Copyright (c) 2021 Upside Down Labs - contact@upsidedownlabs.tech
// Permission is hereby granted, free of charge, to any person obtaining a copy // of this software and associated documentation files (the "Software"), to deal // in the Software without restriction, including without limitation the rights // to use, copy, modify, merge, publish, distribute, sublicense, and/or sell // copies of the Software, and to permit persons to whom the Software is // furnished to do so, subject to the following conditions:
// The above copyright notice and this permission notice shall be included in all // copies or substantial portions of the Software.
// THE SOFTWARE IS PROVIDED "AS IS", WITHOUT WARRANTY OF ANY KIND, EXPRESS OR // IMPLIED, INCLUDING BUT NOT LIMITED TO THE WARRANTIES OF MERCHANTABILITY, // FITNESS FOR A PARTICULAR PURPOSE AND NONINFRINGEMENT. IN NO EVENT SHALL THE // AUTHORS OR COPYRIGHT HOLDERS BE LIABLE FOR ANY CLAIM, DAMAGES OR OTHER // LIABILITY, WHETHER IN AN ACTION OF CONTRACT, TORT OR OTHERWISE, ARISING FROM, // OUT OF OR IN CONNECTION WITH THE SOFTWARE OR THE USE OR OTHER DEALINGS IN THE // SOFTWARE.
- include <math.h>
- define SAMPLE_RATE 75
- define BAUD_RATE 115200
- define INPUT_PIN A0
- define OUTPUT_PIN 13
- define DATA_LENGTH 10
int data_index = 0; bool peak = false;
void setup() {
// Serial connection begin
Serial.begin(BAUD_RATE);
// Setup Input & Output pin
pinMode(INPUT_PIN, INPUT);
pinMode(OUTPUT_PIN, OUTPUT);
}
void loop() { // Calculate elapsed time static unsigned long past = 0; unsigned long present = micros(); unsigned long interval = present - past; past = present;
// Run timer static long timer = 0; timer -= interval;
// Sample if(timer < 0){ timer += 1000000 / SAMPLE_RATE;
// Sample and Nomalize input data (-1 to 1)
float sensor_value = analogRead(INPUT_PIN); float signal = EOGFilter(sensor_value)/512;
   	// Get peak
   	peak = Getpeak(signal);
   	// Print sensor_value and peak
   	Serial.print(signal);
   	Serial.print(",");
   	Serial.println(peak);
   	// Blink LED on peak
   	digitalWrite(OUTPUT_PIN, peak);
} }
bool Getpeak(float new_sample) { // Buffers for data, mean, and standard deviation static float data_buffer[DATA_LENGTH]; static float mean_buffer[DATA_LENGTH]; static float standard_deviation_buffer[DATA_LENGTH];
// Check for peak if (new_sample - mean_buffer[data_index] > (DATA_LENGTH*1.2) * standard_deviation_buffer[data_index]) { data_buffer[data_index] = new_sample + data_buffer[data_index]; peak = true; } else { data_buffer[data_index] = new_sample; peak = false; }
// Calculate mean float sum = 0.0, mean, standard_deviation = 0.0; for (int i = 0; i < DATA_LENGTH; ++i){ sum += data_buffer[(data_index + i) % DATA_LENGTH]; } mean = sum/DATA_LENGTH;
// Calculate standard deviation for (int i = 0; i < DATA_LENGTH; ++i){ standard_deviation += pow(data_buffer[(i) % DATA_LENGTH] - mean, 2); }
// Update mean buffer mean_buffer[data_index] = mean;
// Update standard deviation buffer standard_deviation_buffer[data_index] = sqrt(standard_deviation/DATA_LENGTH);
// Update data_index data_index = (data_index+1)%DATA_LENGTH;
// Return peak return peak; }
// Band-Pass Butterworth IIR digital filter, generated using filter_gen.py. // Sampling rate: 75.0 Hz, frequency: [0.5, 19.5] Hz. // Filter is order 4, implemented as second-order sections (biquads). // Reference: // https://docs.scipy.org/doc/scipy/reference/generated/scipy.signal.butter.html // https://courses.ideate.cmu.edu/16-223/f2020/Arduino/FilterDemos/filter_gen.py float EOGFilter(float input) {
 float output = input;
 {
   static float z1, z2; // filter section state
   float x = output - 0.02977423*z1 - 0.04296318*z2;
   output = 0.09797471*x + 0.19594942*z1 + 0.09797471*z2;
   z2 = z1;
   z1 = x;
 }
 {
   static float z1, z2; // filter section state
   float x = output - 0.08383952*z1 - 0.46067709*z2;
   output = 1.00000000*x + 2.00000000*z1 + 1.00000000*z2;
   z2 = z1;
   z1 = x;
 }
 {
   static float z1, z2; // filter section state
   float x = output - -1.92167271*z1 - 0.92347975*z2;
   output = 1.00000000*x + -2.00000000*z1 + 1.00000000*z2;
   z2 = z1;
   z1 = x;
 }
 {
   static float z1, z2; // filter section state
   float x = output - -1.96758891*z1 - 0.96933514*z2;
   output = 1.00000000*x + -2.00000000*z1 + 1.00000000*z2;
   z2 = z1;
   z1 = x;
 }
 return output;
} Kombination Servomotor / Gesichts Sensorik (Versuch) // Include the Arduino Stepper.h library:
- include <Stepper.h>
// Servo Control - BioAmp EXG Pill // https://github.com/upsidedownlabs/BioAmp-EXG-Pill
// Upside Down Labs invests time and resources providing this open source code, // please support Upside Down Labs and open-source hardware by purchasing // products from Upside Down Labs!
// Copyright (c) 2021 Upside Down Labs - contact@upsidedownlabs.tech
// Permission is hereby granted, free of charge, to any person obtaining a copy // of this software and associated documentation files (the "Software"), to deal // in the Software without restriction, including without limitation the rights // to use, copy, modify, merge, publish, distribute, sublicense, and/or sell // copies of the Software, and to permit persons to whom the Software is // furnished to do so, subject to the following conditions:
// The above copyright notice and this permission notice shall be included in all // copies or substantial portions of the Software.
// THE SOFTWARE IS PROVIDED "AS IS", WITHOUT WARRANTY OF ANY KIND, EXPRESS OR // IMPLIED, INCLUDING BUT NOT LIMITED TO THE WARRANTIES OF MERCHANTABILITY, // FITNESS FOR A PARTICULAR PURPOSE AND NONINFRINGEMENT. IN NO EVENT SHALL THE // AUTHORS OR COPYRIGHT HOLDERS BE LIABLE FOR ANY CLAIM, DAMAGES OR OTHER // LIABILITY, WHETHER IN AN ACTION OF CONTRACT, TORT OR OTHERWISE, ARISING FROM, // OUT OF OR IN CONNECTION WITH THE SOFTWARE OR THE USE OR OTHER DEALINGS IN THE // SOFTWARE.
- if defined(ESP32)
#include <ESP32Servo.h>
- else
#include <Servo.h>
- endif
// Define number of steps per rotation: const int stepsPerRevolution = 1024; // 2048;
int muscle_trigger = 1;
// Wiring: // Pin 8 to IN1 on the ULN2003 driver // Pin 9 to IN2 on the ULN2003 driver // Pin 10 to IN3 on the ULN2003 driver // Pin 11 to IN4 on the ULN2003 driver
// Create stepper object called 'myStepper', note the pin order: Stepper myStepper = Stepper(stepsPerRevolution, 8, 10, 9, 11);
- define SAMPLE_RATE 500
- define BAUD_RATE 115200
- define INPUT_PIN A0
- define BUFFER_SIZE 500
- define SERVO_PIN 10
- define EMG_MIN 2
- define EMG_MAX 10
int circular_buffer[BUFFER_SIZE]; int data_index, sum;
Servo servo;
void setup() {
 // Set the speed to 5 rpm:
 myStepper.setSpeed(35);
 // Serial connection begin
 Serial.begin(BAUD_RATE);
 // Attach servo
 servo.attach(SERVO_PIN);
}
//////////////////////////// void move_cw(int steps){
myStepper.step(steps);
}
//////////////////////////// void move_ccw(int steps){
myStepper.step(-steps);
}
//////////////////////////// void check_muscle(){
 if (muscle_trigger > 0){
     move_ccw(10);
 }
}
void loop() {
 // Step one revolution in one direction:
 Serial.println("clockwise");
 myStepper.step(stepsPerRevolution);
 delay(500);

 // Step one revolution in the other direction:
 Serial.println("counterclockwise");
 myStepper.step(-stepsPerRevolution);
 delay(500);
 // Calculate elapsed time
 static unsigned long past = 0;
 unsigned long present = micro
Verwendete Ressourcen
Anleitung Muscle SpikerShield: [1]
Weitere Infos zum Muscle SpikerShield: [2]
Interessante EKG Einführung: [3]
FabLab Homepage: [4]
Abschlusspräsentation
Am Samstagmorgen präsentierte das Team Amigo seine Ergebnisse den anderen Teams. Beim amüsanten Austausch mit den Gruppen wurde auf die gesamte Blockwoche zurückgeschaut. Anschliessend ist die Präsentation des Teams Abartig abgelegt.

