Difference between revisions of "Reflow 0603 SMT components at Home"
| (4 intermediate revisions by the same user not shown) | |||
| Line 1: | Line 1: | ||
| + | Part of our research activities at [[ROŠA - Regional Open Science Hardware & Art, Indonesia]] | ||
[[File:reflow_comparison_oldschool.jpg|400px]][[File:reflow_success_stabilized.gif|300px]][[File:reflow_01_setup.jpg|400px]] | [[File:reflow_comparison_oldschool.jpg|400px]][[File:reflow_success_stabilized.gif|300px]][[File:reflow_01_setup.jpg|400px]] | ||
| Line 4: | Line 5: | ||
=== Making the stencil === | === Making the stencil === | ||
| − | [[File:reflow_laserCutStencil.jpg|400px]] | + | [[File:reflow_laserCutStencil.jpg|400px]] |
| + | |||
| + | We managed to produce our own stencils for applying the solder paste using a low-cost laser engraving module. The [https://www.creality3dofficial.com/products/cv-laser-engraver-kit Creality Ender S1] is a bery suitable 3d-printer and for 80USD extra you can get the laser engraving module. It's a but tricky to find the right settings, speed and strenght etc, to make precise stencil, focus calibration and color and property of the paper, each time you will have to fiddle the settings for optimal results. | ||
=== Preparing for reflow === | === Preparing for reflow === | ||
<gallery mode="packed-hover" heights=200px> | <gallery mode="packed-hover" heights=200px> | ||
| − | File:reflow_01_setup.jpg | + | File:reflow_01_setup.jpg|Preparing a simple setup. Just tape things down and fix the PCB |
| − | File:reflow_02_positionStencil.jpg | + | File:reflow_02_positionStencil.jpg|Precisely position the stencil and tape it down in place |
| − | File:reflow_03_addPaste.jpg | + | File:reflow_03_addPaste.jpg|Add some solder paste, Mechanik seems to be the brand of choice |
| − | File:reflow_04_smearPaste.jpg | + | File:reflow_04_smearPaste.jpg|Use a some kinda rakel and smear it onto the pads |
</gallery> | </gallery> | ||
| Line 18: | Line 21: | ||
<gallery mode="packed-hover" heights=200px> | <gallery mode="packed-hover" heights=200px> | ||
| − | File:reflow_05_controlPaste.jpg | + | File:reflow_05_controlPaste.jpg|Check how nicely the paste was applied. if bad, just clean it and try again |
| − | File:reflow_06_placeParts.jpg | + | File:reflow_06_placeParts.jpg|Now start placing the parts with a fine tweezer |
| − | File:reflow_07_readyForReflow.jpg | + | File:reflow_07_readyForReflow.jpg|Don't worry too much if they are not perfeclty positioned... it will work miraculously! |
| − | File:reflow_on_hotPlate.jpg | + | File:reflow_on_hotPlate.jpg|Put it on the hotplate and start heating |
| − | File:reflow_on_hotPlate_2.jpg | + | File:reflow_on_hotPlate_2.jpg|Watch the process self-aligning and soldering all the parts |
| − | File:reflow_09_done.jpg | + | File:reflow_09_done.jpg|There you go, DONE! |
</gallery> | </gallery> | ||
Latest revision as of 11:52, 7 November 2022
Part of our research activities at ROŠA - Regional Open Science Hardware & Art, Indonesia


Making the stencil

We managed to produce our own stencils for applying the solder paste using a low-cost laser engraving module. The Creality Ender S1 is a bery suitable 3d-printer and for 80USD extra you can get the laser engraving module. It's a but tricky to find the right settings, speed and strenght etc, to make precise stencil, focus calibration and color and property of the paper, each time you will have to fiddle the settings for optimal results.
Preparing for reflow
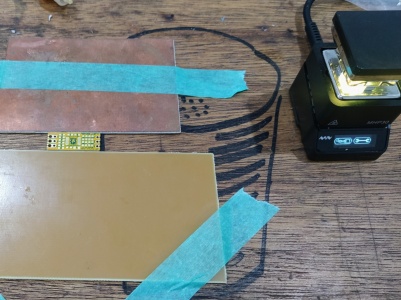
Preparing a simple setup. Just tape things down and fix the PCB
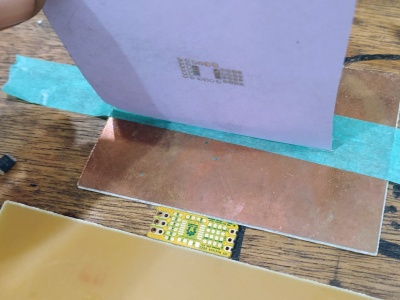
Precisely position the stencil and tape it down in place
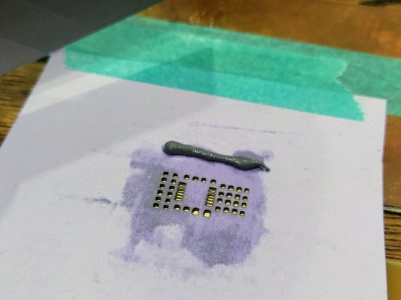
Add some solder paste, Mechanik seems to be the brand of choice

Use a some kinda rakel and smear it onto the pads


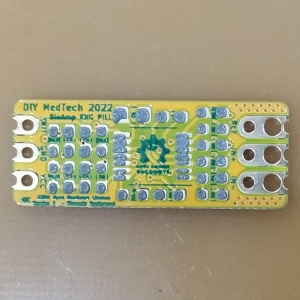
Reflowing on small Hotplate
Check how nicely the paste was applied. if bad, just clean it and try again
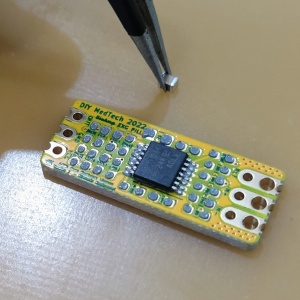
Now start placing the parts with a fine tweezer
Don't worry too much if they are not perfeclty positioned... it will work miraculously!
Put it on the hotplate and start heating
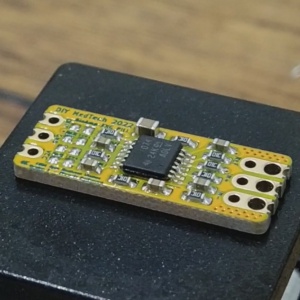
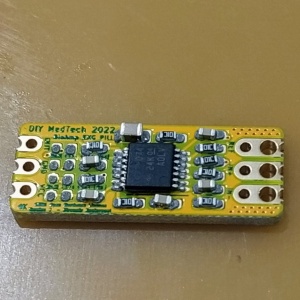
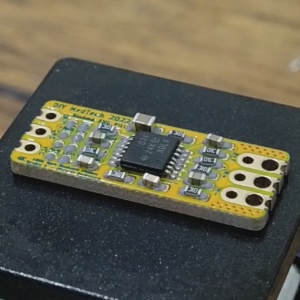
Watch the process self-aligning and soldering all the parts
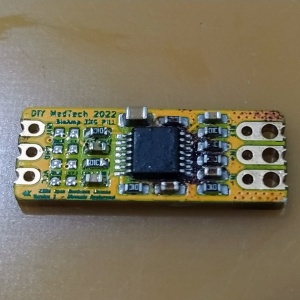
There you go, DONE!


