DIY handheld centrifuge
Contents
INTRODUCTIONS
A centrifuge is a rotating body with very high RPM. The vial holders at the edge of the body spinning at high rpm are used to separate substances of different densities.
You will need,
1. A hand-blender
2. A circular disc/ a fan/ wheel or anything which is fit enough to spin on the blender's blade. It needs to be a little bigger than a tea-cup's saucer.
3. PVC pipe; long enough to cut out six pieces which would fit test-tubes inside, the width will need to be a little larger than that of the test-tube.
4. Pipe caps to seal off the bottom of each pipe-piece.
5. Synthetic wire, about 2mm thick.
6. A drill, with a 1 or 2mm drill bit.
7. A cutter and a mini hack saw.
PROCEDURE
How our centrifuge functions
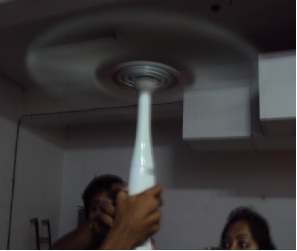
we have used a hand blender with rpm and attatched a disk onto it to make our frtating body. to this disk we have connected holders for the vials, thus making a centrifuge.
Making a Hand-held Centrifuge
To make the rotating body,
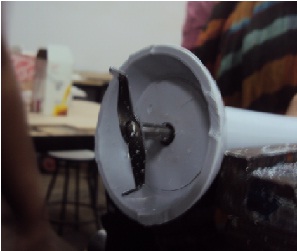
1. If the blender's blade is surrounded by a border, saw it off, it'll be easier to fix the disc/wheel/fan this way.
2. Take the disc/ wheel/fan place it over the blades of the blender, make sure it's centered. Mark the points of the blades on the disc/wheel/fan.
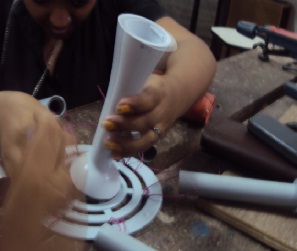
3. Drill holes in the disc/wheel/fan where the points were marked, use a cutter and make the holes wide enough to fix the blades into them.
4. If there is no provision on the disc/wheel/fan to tie the test-tube holders, make six holes on the edge of the disc/wheel/fan to do so.
5. Now, fix the disc/wheel/fan onto the blender's blades. To secure use Emseal around, over and under the area where the blades protrude out of the disc/wheel/fan.
6. Let it dry completely.(Making sure it's dry is very important.)
To make Test-tube holders,
7. Cut up the PVC pipes into six pieces.
8. Drill two holes at the edge of the pipe, one at each end of the Diameter of the pipe.
9. Fix the Pipe caps at the bottom of each pipe, if they are loose, seal them off with the sealant.
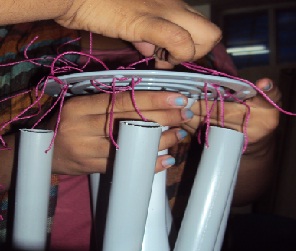
10.Pass one wire through each hole, knot it so it doesn't slip through the hole.
Finally,
11. Once the sealant on the blender's blade has dried up completely, tie up the ends of each wire in the pipes onto the holes on the edge of the disc/wheel/fan. Make sure the knots are all very strong.
Picture Reference :
PRECAUTIONS
1. Handle blade and other sharp objects with care.
2. While operating final product hold away from body and face, if possible use a protective shield, ex: a riding helmet.
3. Be careful while testing the product for the first time, use plastic test tubes or similar objects rather than a glass test tube; there is a chance of the caps on the holders giving way and the test tube shooting out; this could be extremely dangerous to any one standing around the area(trust us).
4. Make sure the blender's motor doesn't get too hot, when hot allow it too cool down before using again.


